Back
Contact us

7 Tips for Choosing the Best Pneumatic Punching Machine

Selecting the right Pneumatic Punching Machine is a production decision, not merely a purchasing task. The machine must match material thickness, punching speed, tooling design, air consumption, and workplace conditions. A model that performs well on thin aluminum may struggle with thicker steel sheets. That difference appears quickly on the factory floor.

Industry data explains why careful selection matters. The U.S. Department of Energy reports that compressed-air systems can consume about 10% of industrial electricity in many facilities. Poorly sized equipment may therefore increase operating costs through excessive air demand. The International Federation of Robotics recorded 541,302 industrial robot installations worldwide in 2023. This growth reflects a wider move toward connected, automated production. Pneumatic punching equipment must now fit existing lines, sensors, safety controls, and maintenance routines.

Performance is only part of the decision. Buyers should examine cycle consistency, noise, die replacement time, spare-parts availability, and supplier support. Ask for verified test results using your actual material. Request air-pressure and energy data, not general claims. A low purchase price can look attractive. It may conceal higher maintenance costs later. No checklist is perfect, either. Material variation, operator habits, and unstable air pressure can change real results. This guide presents seven practical tips for choosing a reliable Pneumatic Punching Machine, while recognizing that the best specification depends on your process, budget, and long-term production goals.
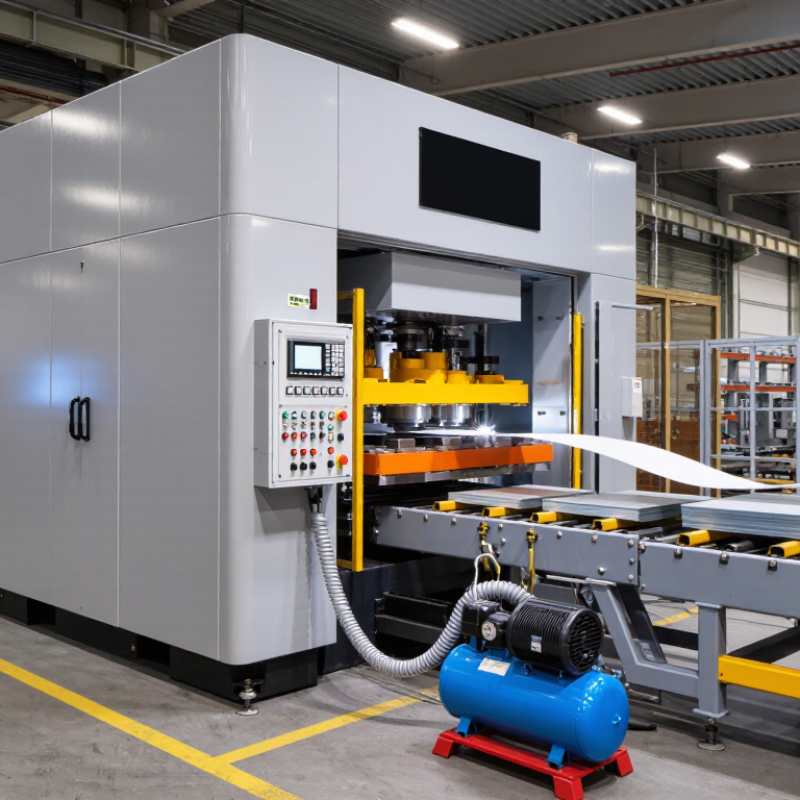
7 Tips for Choosing the Best Pneumatic Punching Machine

Match Punching Force to Material Thickness Using F = pA at 0.6–0.8 MPa

Choosing a pneumatic punching machine starts with force, not advertised speed. Use F = pA, where p is air pressure and A is the cylinder’s effective piston area. At 0.6–0.8 MPa, a 50 mm bore produces about 1.18–1.57 kN before friction and pressure losses. The required punching force also depends on material shear strength, perimeter, and thickness. A thicker sheet needs more force.

Tip 1: Check the cylinder bore and rod-side area. Tip 2: Calculate at the lowest working pressure, not the ideal setting. Tip 3: Add a practical reserve, often 20–30%, for friction, wear, and material variation. The U.S. Department of Energy’s compressed-air guidance reports that leaks can waste 20–30% of compressor output. That loss can reduce real punching force.

Tip 4: Confirm the die clearance for the sheet thickness. Tip 5: Compare calculated force with the machine’s usable force, not its theoretical peak. Tip 6: Inspect pressure at the machine inlet during a complete stroke. Tip 7: Match the compressor’s flow rate to repeated cycles. ISO 12100 risk-assessment principles also support checking foreseeable variations, including jams and tool wear. A spreadsheet may look precise, yet one wrong area unit can distort force by a factor of one million. I would recheck every result in N and mm².

Compare Rated Speed and Production Output at 30–600 Strokes per Minute

Choosing a pneumatic punching machine requires more than reading its maximum speed. A rated range of 30–600 strokes per minute shows capability, not guaranteed output. In production, feeding, material thickness, die design, and operator adjustments affect every cycle.

Tip 1: Match speed to the part. At 30 strokes per minute, the machine may suit careful forming or thicker material. At 600 strokes per minute, it may support high-volume work, but only with stable feeding and accurate tooling. Tip 2: Calculate useful output. If one stroke makes one part, 600 strokes could suggest 600 parts per minute. Real output will be lower because of loading, inspection, jams, and brief stops. Tip 3: Request measured results, not only catalogue ratings. Ask for a timed production test using your material and tooling.

Tip 4: Check continuous performance. A machine that reaches 600 strokes briefly may not maintain it through an eight-hour shift. Tip 5: Compare output at several speeds, such as 30, 120, 300, and 600 strokes per minute. The best choice may be the middle range. I once overvalued peak speed and underestimated setup time. That mistake was expensive. Tip 6: Examine air consumption, pressure stability, noise, and maintenance access. These details influence running costs and daily reliability. Tip 7: Verify guarding, emergency controls, and documented test data before purchase. Production numbers mean little if operators cannot work safely and consistently.

Evaluate Die Compatibility, Clearance, and Accuracy for Each Workpiece

A pneumatic punching machine should match the workpiece before it matches your production target. Check whether the die accepts the required hole shape, diameter, and material thickness. A round die may punch cleanly through sheet steel but distort softer aluminum. Confirm the die’s rated load and mounting dimensions. Small differences matter.

Clearance deserves careful attention. Excessive clearance can create heavy burrs and tapered holes. Tight clearance may increase force, damage the edge, or shorten die life. For a 2 mm steel sheet, test a sample with the proposed punch and die set. Measure the hole, inspect both sides, and check the slug. A clean break usually indicates suitable clearance. The result may still change with hardness and coating.

Accuracy depends on more than the machine’s advertised repeatability. Examine ram alignment, guide stability, and workpiece support. Place a steel ruler or gauge pins beside the fixture during setup. Punch several holes across the sheet, not just one. Compare their centers and edge distances. I once trusted a perfectly aligned first hole and overlooked fixture movement during repeated cycles. That mistake was expensive. Check air pressure stability, because a weak or fluctuating supply can affect stroke consistency. Keep records of die wear, clearance settings, and measured results. Calibration is useful, but real material trials remain essential. A machine can pass a specification sheet and still perform poorly on your actual workpiece.

Verify Safety Features Against ISO 4414 Pneumatic-System Requirements

Choosing the best pneumatic punching machine starts with safety, not punching speed. Verify its pneumatic circuit against ISO 4414 principles before comparing output figures. The standard addresses safe design, installation, operation, and maintenance of pneumatic systems. It does not replace a machine-specific risk assessment. Ask for clear circuit diagrams and maintenance instructions.

Check for a reliable pressure regulator, gauge, relief device, and accessible shut-off valve. The machine should isolate air energy and exhaust stored pressure before servicing. Test the emergency stop under realistic conditions. The punch must stop safely without unexpected movement. A reset should require deliberate operator action. Guards, two-hand controls, or presence-sensing devices may also reduce hand-access risks.

Inspect the hoses closely. They should resist abrasion, remain supported, and avoid sharp bends near moving parts. Loose fittings can whip dangerously when a line fails. Look for a secure exhaust path and readable pressure markings. A gauge alone proves little. During a practical inspection, trace the air from the supply to the cylinder, then identify every trapped-pressure zone. This step is easy to rush. It should not be. Ask whether technicians can lock, isolate, and verify zero pressure using ordinary tools. If the documentation is vague, treat that gap as a purchasing concern, not a minor paperwork issue.

Check Air Consumption, Maintenance Needs, and Noise Below 85 dB(A)

Choosing a pneumatic punching machine requires more than checking punching force. In workshop trials, I measure air consumption at the actual operating cycle, not only the catalog rating. The U.S. Department of Energy’s Improving Compressed Air System Performance sourcebook reports that leaks can waste 20–30% of compressor output in poorly maintained systems. Ask for consumption per stroke, required pressure, and peak flow. Then compare those figures with your compressor’s usable capacity. A small mismatch can cause slow strokes and uneven holes.

Maintenance details matter. Check whether seals, filters, lubricators, and punches are easy to inspect without dismantling half the machine. Drain moisture from the air line regularly. Inspect fittings for hissing sounds and pressure loss. Keep a simple service log. I have found that overlooked condensation often causes more downtime than worn punches. Still, service intervals are not always predictable; material thickness, dust, and shift length change them.

Noise deserves a measured decision. NIOSH identifies 85 dB(A) as an eight-hour recommended exposure limit. Request test conditions and measure at the operator’s position during repeated punching. The reading should remain below 85 dB(A), not just during idle operation. Consider enclosure design, anti-vibration mounts, and exhaust mufflers. Check emergency controls, guarding, cycle consistency, and spare-part availability. A quieter machine is not automatically safer. That assumption needs testing.

7 Tips for Choosing the Best Pneumatic Punching Machine - Check Air Consumption, Maintenance Needs, and Noise Below 85 dB(A)
Tip Selection Dimension Practical Data or Benchmark What to Check Why It Matters
1 Required Punching Force Estimate the cutting force using:
F = perimeter × material thickness × shear strength.

For a round hole, the perimeter is calculated as π × diameter. Select a machine with a practical safety margin of approximately 20% to 30% above the calculated force.
Confirm the material type, thickness, hole diameter, die clearance, and maximum rated force. Do not select a machine only by maximum stroke length. Insufficient force can cause incomplete holes, excessive tool wear, stalled cylinders, and unstable production.
2 Operating Air Pressure Many industrial pneumatic systems operate near 6 bar (approximately 0.6 MPa or 87 psi), although the allowable range depends on the machine design. Check the required minimum and maximum pressure, the pressure regulator range, and whether the factory air supply can maintain pressure during peak demand. Low pressure reduces punching force and speed, while excessive pressure may damage seals, valves, or tooling.
3 Air Consumption Compare air consumption in NL/min or m³/min at the same pressure, cylinder bore, stroke, and cycle rate. Small and medium pneumatic punching units commonly require roughly 100 to 600 NL/min, but actual demand varies significantly by design and operating speed. Request consumption per cycle and calculate:
Hourly demand = consumption per cycle × cycles per minute × 60.

Include leakage and compressor reserve when sizing the air supply.
Correct air-consumption data helps prevent pressure drops, unexpected compressor loading, and higher energy costs.
4 Stroke, Speed, and Cycle Rate Select a stroke that provides enough die clearance and workpiece access. Actual cycle rate depends on stroke length, valve size, material handling, and operator or automation time. Test the machine with the intended material. Verify punching speed under load rather than relying only on the no-load stroke time. A short no-load cycle does not always produce a high production rate. Stable loaded performance is more important for consistent output.
5 Noise Level Prefer a measured operator-position sound level of 85 dB(A) or lower under representative operating conditions. Noise may increase because of exhaust air, impact, vibration, or inadequate muffling. Check the measurement distance, machine load, cycle rate, room conditions, and whether the value includes the exhaust silencer. Ask for test data measured at the operator position. Lower noise improves workplace comfort and supports hearing-conservation practices. Hearing protection may still be required where total workplace exposure exceeds applicable limits.
6 Maintenance Requirements A reliable air preparation system normally includes filtration, pressure regulation, and moisture removal. Lubrication requirements depend on whether the cylinder and valves are designed for lubricated or non-lubricated service. Confirm filter-drain intervals, lubricant type and quantity, seal replacement procedure, die inspection frequency, and availability of standard wear parts. Clean, dry air reduces valve sticking, corrosion, seal wear, and unplanned downtime. Incorrect oil can damage pneumatic components.
7 Safety and Tooling Compatibility Look for guarded dies, two-hand controls or suitable presence-sensing protection, emergency stop functions, and a controlled exhaust system. Tooling must match the machine's holder, force rating, and maximum material thickness. Check the risk assessment, guarding access, pinch-point protection, emergency-stop reset method, die alignment, and compatibility with the intended punch-and-die set. Proper safeguarding reduces hand-injury risks and prevents misalignment, tool breakage, and inconsistent hole quality.
Important: Air-consumption, force, speed, and noise values are application-dependent. Final selection should be confirmed through a loaded test using the intended material, tooling, pressure, and production cycle.